Search This Blog

Saturday, 30 August 2014

Rainbow Christmas Tree Bunting !

Had a bit of a panic yesterday, I woke up with a very swollen and very painful left index finger, my yarn finger! No idea why it was like that but I was very worried I wouldn't be able to crochet.
I thought I would try it out with something very simple and I've had this idea for a while, it's all in DC so nice and gentle on my poorly finger. Big relief, it didn't hurt!

So I started making these, little Christmas trees!

I know, I know, it's still August (just) but like I've said before, you have to start early or you run out of time!

It is a very simple pattern and I have already written it up should anyone else like a try - so efficient of me! I have taken some pictures as I went so that it should be nice and easy to follow for beginners.

Of course these Christmas trees don't have to be in rainbow colours, they could all be done in whatever your Christmas colour scheme is, or with sparkly yarn. You could sew beads or buttons or ribbons on to jazz them up a bit too. Personally I love all the bright colours I've used here, my decorations get brighter and more colourful every year. It's great to have the house filled with a riot of colour at Christmas! They might not be the most traditional of colours but they are so cheerful, juicy and bright that they never fail to make me smile :)

XXX


Thursday, 28 August 2014

Top Tip - Joining Trebles

A quick Top Tip for you today on joining trebles. The example here shows joining trebles when making a flat circle but I can't see any reason why it wouldn't work with squares too.

I'm sure every crocheter has at some point made a flat circle. The very basic pattern being Chain four, join to form a ring, Chain three (counts as one treble) crochet five trebles into the ring, join with a slip stitch to the top of the chain three. The next row would be two trebles in each stitch, the row after would be two trebles in the first stitch, one treble in the next stitch... you get the idea. 
The problem with this is that at the end of each round you join with a slip stitch into the chains at the beginning of the round. You then chain three and make another treble into that same chain, it can end up looking gappy and the bigger the circle gets the more obvious this line of gaps is.

To help avoid this, instead of starting your next round out of the top of the chain three from the previous round, slip stitch to the next stitch and start from there! That is what I have done on the circle below, and Ok you can still see where the join is if you look closely, but it is much less obvious and much neater.
You then do your last stitch of the round out of the slip stitch at the beginning of the round.

Hope that has helped!

XXX


Wednesday, 27 August 2014

Pretty but not quite right

I am very undecided about what I have been making over the last few days, sometimes I love it, other times I look at it and I'm disappointed. It was going to be a present for a friend but as I am so unsure about it I think I will call it a trial run and make her another one, with a few changes.
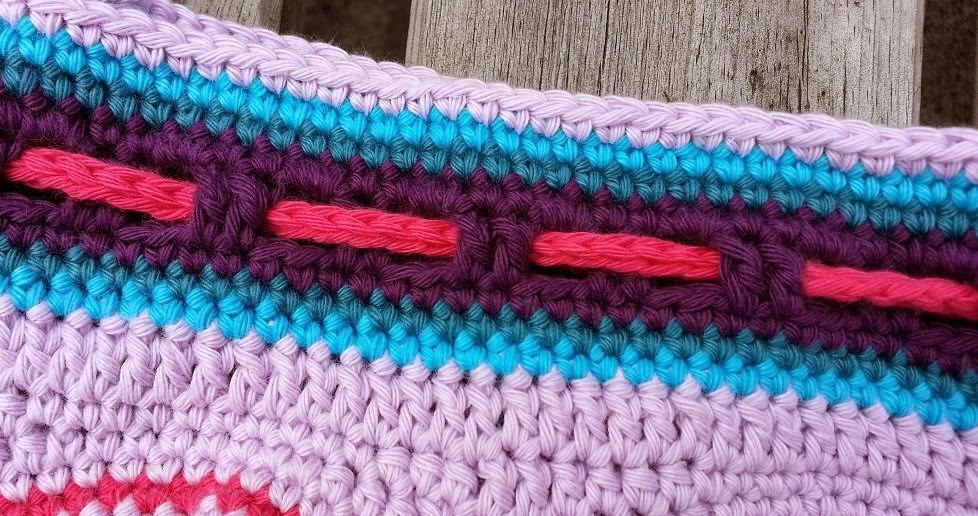
So what were these African Flower hexagons going to be? A bag of course! This bag to be precise.
I have loved this bag for years and it has been on my list to make for a very long time. A friend of mine has recently made herself one and it looked so good that I wanted to give it a bash.
So I hooked up all those lovely hexagons over the weekend and started on the rest of the bag this week. There are parts of it that I love; the top and bottom of the bag and the fabric with little strawberries on that I got to line it with. 

 What I am most unsure of is the stitching around the hexagons. 
The pattern clearly said to do this stitching in a contrasting colour so that it is visible. I spent ages sewing them all together and wasn't sure I was entirely happy with the result at that point. On the original pattern the colours are grey and lilac, much more muted and very effective, I think mine being in such strong contrasting colours just looks a bit odd.

I persevered and hoped that it might look OK when I had added all the other bits to it but I am still not sure I like that stitching, it just looks untidy and I was so careful as I did it, I don't think I could have done any better.

I am going to finish it, line it and sew the strap on, it is still a pretty bag just not perhaps exactly as I would like it.

Time for Plan B, I will let you know when I work out what that is :)

XXX

Sunday, 24 August 2014

Happy Sundays

Excuse me for being extremely happy today, I am having a great Bank holiday weekend :)

On Friday I got all the boring wifey houseworky stuff done (it's only fair what with me still being jobless) so that freed up Saturday for some quality crochet time, Formula one qualifying and brand new Doctor Who! I know, I know I am a super geek, that's fine with me!
Some little Doctor Who things I have made previously, an Ood and a Weeping Angel, I have made a Doctor before but don't really have any good pictures to share and he lives with a friend now.

I spent most of yesterday trying to refine some Christmas ideas, this involved lots and lots of double crocheting in brown. yuck. 
After a few hours of that and it not turning out how I wanted, I was craving colour so put it away and decided to get cracking on some Christmas presents. Please don't judge me too harshly for mentioning the C word in August but I find it really does help to start as early as possible or the run up to December is spent making things with a tight deadline and crocheting can feel more like a chore than a nice relaxing hobby.
I popped to a local haberdashery on Thursday to stock up on some Rico Creative cotton which I was running desperately low on and started putting together a present for one of my best friends.
These are the only pictures I think I will be able to share until after Christmas, I'm not sure how I am going to wait that long to post a picture, I absolutely love this 'thing' and want to show you it so much!
Today has carried on much the same as yesterday, some great racing on the TV while I took care of some sewing of ends and a delicious smelling roast in the oven for dinner. I'm not sure what tomorrow holds but it is bound to involve crocheting at some point, I might even have another bash at the brown thing if inspiration hits me.

I do hope you are having a cracking Sunday too xxx

Wednesday, 20 August 2014

Top Tip Wednesday - Foundation chains

You get a pattern for a gorgeous blanket/cushion/bag and can't wait to get started. You've got your yarn all nicely chosen in wonderful colours and know that it is going to be a fabulous hooky journey for a few days/weeks/months while you merrily crochet your lovely new item.

Hook at the ready, eager with anticipation, you read the first line of your pattern; 'Chain 368, DC in each Chain across', or 'Foundation chain must be in multiples of 12 plus 6'. Your face falls as you just know you will lose count while you make them and counting up chains is not easy after you have made them. So you hook up what you think it the right number of chains (while getting distracted by the TV/ the cat/Facebook) fingers crossed it's right but it won't be until you come to the next row that you will know for certain if you have done enough chains in the foundation row.
You are getting close to the end of the second row now, you still have another five stitches to make and it doesn't look like there is enough chains left, did you miss count? Has the last half an hour/hour/two hours been for nothing? Yes.

Sound familiar? Annoying isn't it. I have found an easy (and so obvious, I don't know why it took me so long to think of it) way around this foundation chain problem - do your best to count the chains as you go and then add a few more! You will be left with a few chains left over at the end of the second row but this is far better than not having enough. 
My tip for dealing with these left over chains is to make the initial slip stitch loose, it can then be unpicked and you can carefully unpick each of these extra chains. Because you are unpicking them from the 'wrong' end of the chain row they won't just unravel either, so you can do this without the worry of the whole thing falling apart!
When you get to the last chain that you worked out of, give the tail end a little tug and it will tighten up nicely. You won't have this problem ever again! :)

XXX

Tuesday, 19 August 2014

Odds and ends (lots of ends!)

It's been a few days since I have done any blogging and sitting down this morning to tell you about what I have been crocheting is a bit of a challenge, I don't feel like I have done much at all. but that can't be right, I have pretty much always got a hook in my hand so what have I been doing?

Well my husband had a rare long weekend off work so we spent much of Friday pottering around the house, catching up on some odd jobs that needed doing and recharging the batteries. Still on a high from nearly having my flower shawl made I cracked on with that, until I got to the part when I can ignore the sewing in of the ends no longer.
Luckily I was very good and made a start on these a while back so there is only about half left to do, a job for a rainy day I think. I have almost decided to stop at this point and not make it any bigger, I think I will get more use out of it like this than carrying on to make it into a throw and it means that I can use what yarn I have left to make something else.

I found the ripple segment that is meant for a big sampler blanket I want to make and got a few more lovely bright ripples hooked up too, such a restful, rhythmic pattern to do, 1234, 1234, 1234...
I've also been sorting out some of my yarn stash, seeing what I am running out of so I can order some more. I have mentioned a few times how my supply of Rico Creative cotton has dwindled so I really tried to get my bag of the stuff tidy and see what was what. As usually happens though I got distracted by the pretty colours and quickly made a stuffed heart. I have made lots and lots of these before, some with roses on and some with felt letters and flowers for christenings. They are usually in one main colour with details in a contrast:
This one is a slight departure from the usual theme:
 I did have vague ideas of sticking some lavender in it from the garden to make it into a smelly hanging thing but I still can't bring myself to cut any of the lavender as the bees are swarming all over it and I don't want to take away their fun! It's pretty as it is, even without the lavender. Nearly every door knob in my house has got something hanging from it, nearly all of them are some type of heart too so I'm not sure what to do with this one, if anyone would like it, please let me know!

XXX

Thursday, 14 August 2014

Nearly a windmill but not quite

I've had this idea now for ages, I really want to make a windmill. I don't know why, but I've looked and can't find a pattern I like so thought I would have a go myself. I had an idea of how I wanted it to look, bright and colourful (of course) and squishy. I wanted it to look simple and not fussy either, so no embroidery or flowers or anything. My idea is very simple, a dome/conical shaped main building part with four sails. So a while ago I made a small dome shape and then got side tracked.

This morning I fancied a change from what I was making so picked up some scraps of stylecraft special dk and worked out a way to make the sails for the windmill.

I made eight so I could make them double sided. Stuffing them would add too much weight to them and might make them floppy, but doubled up and quickly crochet together they are quite stiff and hold their shape nicely.
In my plan the sails aren't just sewn onto the windmill, they actually rotate! So I made a spindle thing to attach to the windmill and crocheted the sails together . This middle bit attaching the sails is being slightly problematic, it is just too floppy. I've doubled it up, crocheted extra rows, folded it back on itself and sewn it together tightly and it is still too floppy.
Not only that but the main dome part of the windmill is way to small for these sails. 
So still some way to go before my squishy windmill is a reality but I absolutely love doing things like this, making things up from ideas that I've had. I have got a bag full of half made bits and pieces that are trial runs of things, where I have been trying to work out how to make stuff. Not sure why I am keeping hold of these bits of tat, they serve no purpose!
 
Meanwhile I will leave my ideas to percolate in my brain and carry on with my flower shawl! With very limited yarn supplies recently I have picked it up again and have totally fallen back in love with it. 
If I stick to my original shawl idea it is nearly finished, I just need to make the left hand side the same shape as the right and maybe add a few more flowers to the pointy bit in the middle. It has been suggested by a few friends that I should make it into a throw and I am very tempted! it would be easy enough to do, just the same shape again to make an oblong rather than a triangle. Will I have enough yarn? I am really not sure.
If I have to buy more it won't be the end of the world, I have many, many ideas of things to make with this Drops cotton merino, it is delicious!

XXX